Japanese Sushi Sandwich – Onigirazu
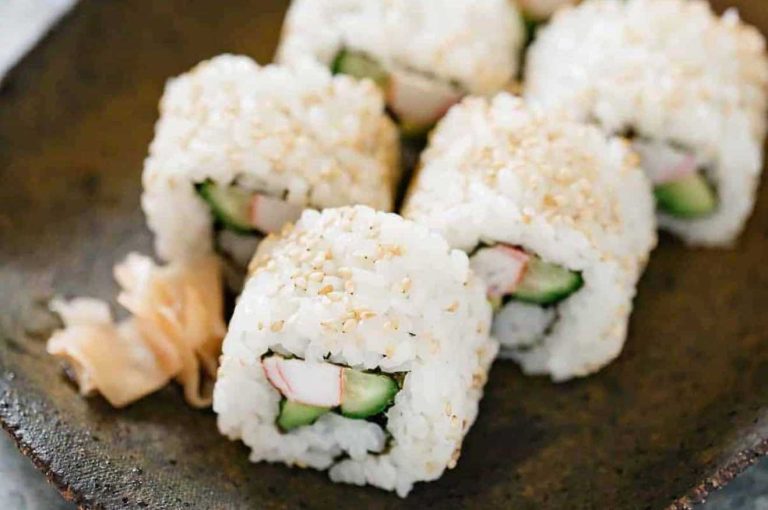
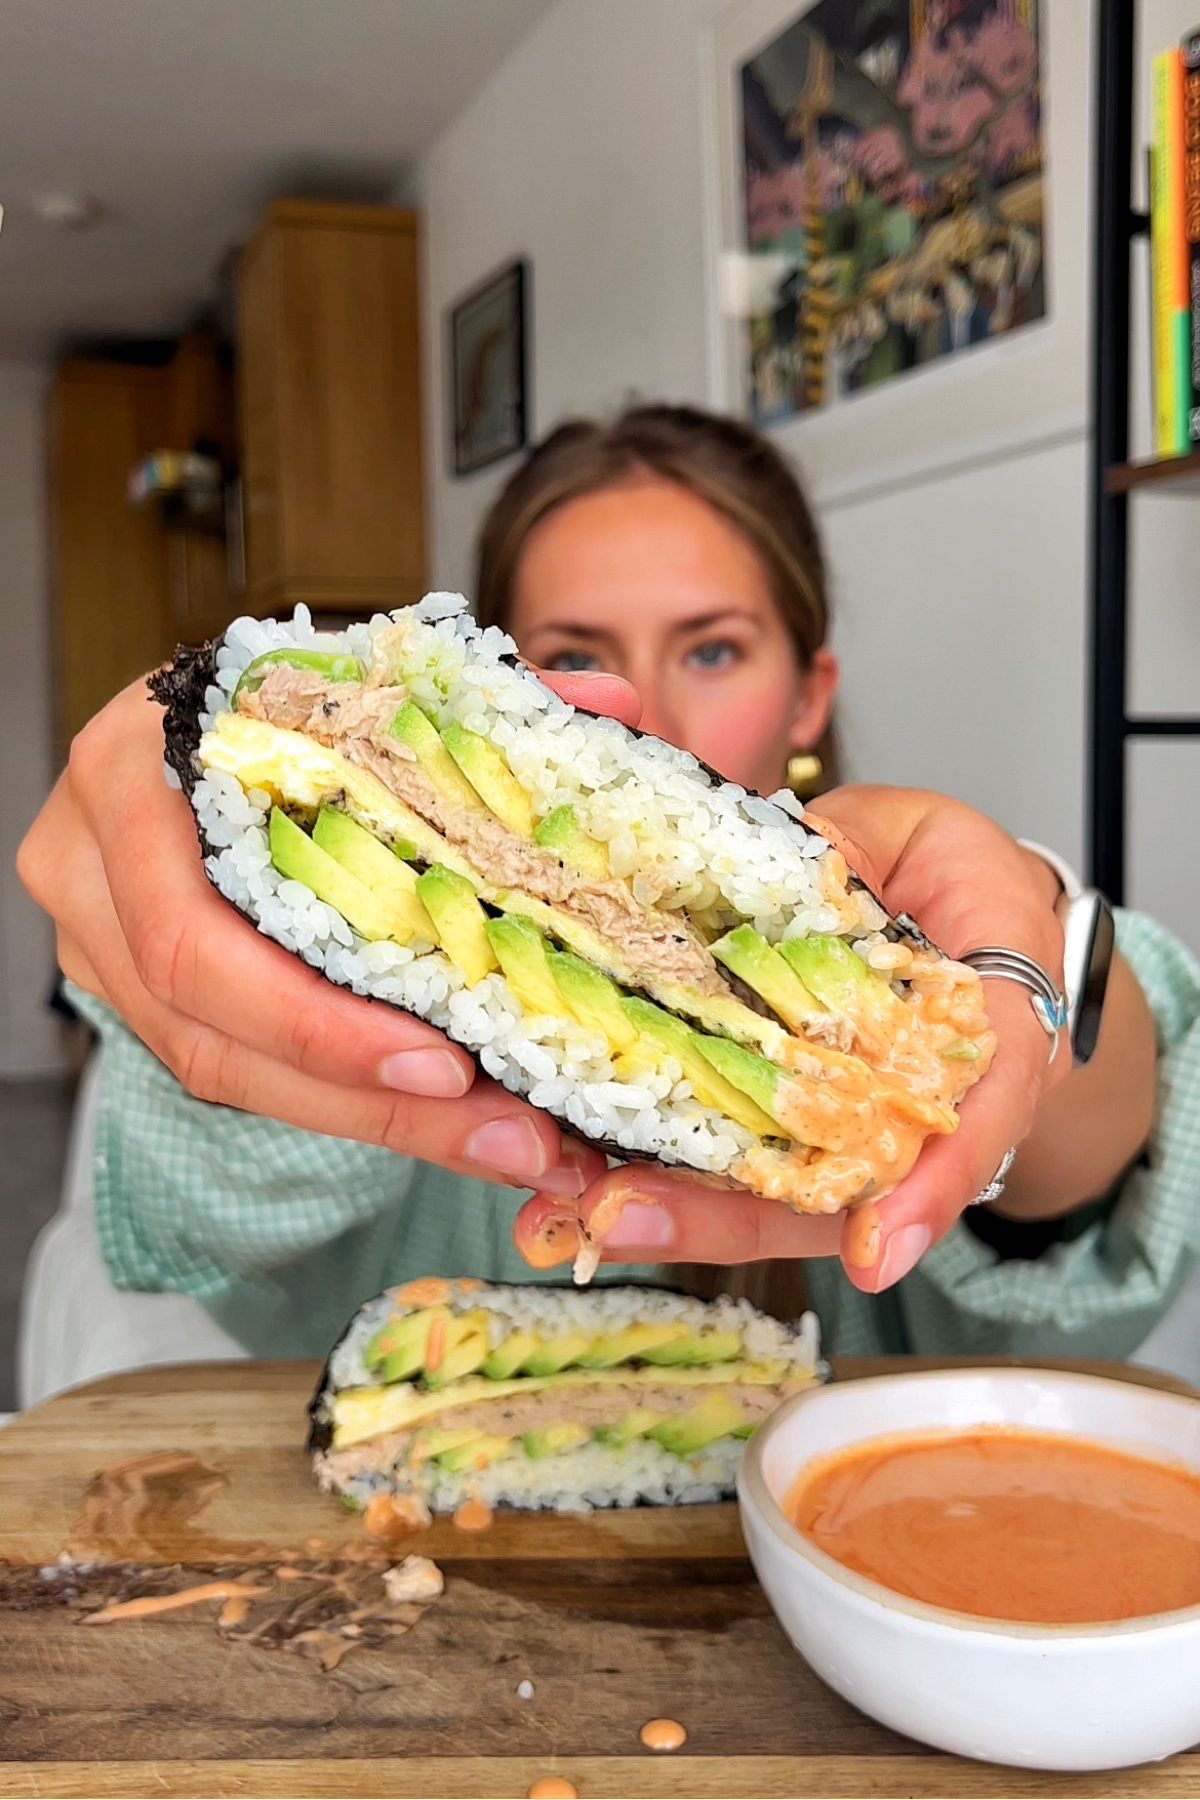
This is my version of Onigirazu, also known as the Japanese Sushi Sandwich. Packed with tuna mayonnaise, omelette, avocado, and the fluffiest sushi rice, it’s an ideal meal to prepare in advance for lunch or dinner. I served mine with a spicy sriracha mayo, and it was absolutely delicious.

Myriad Recipes » Recipes » Other
ONIGIRAZU (JAPANESE SUSHI SANDWICH)
Published: May 17, 2024 by Emily Roz · This post may contain affiliate links · Leave a Comment
This is my take on Onigirazu aka Japanese Sushi Sandwich. Filled with tuna mayonnaise, omelette, avocado, and the fluffiest sushi rice, it’s the perfect meal to prep ahead and eat for lunch or dinner. I served mine with a spicy sriracha mayo and it was so good.

One of my favourite meals to make for lunch is my sushi sandwich. You can make more than one so that you can have them throughout the week. They’re eaten cold, so no need to waste time heating anything up!
Another one of my favourite onigirazu sushi sandwiches is my Katsu Onigirazu sandwich, which combines chicken katsu and the concept of a sushi sandwich.
WHY YOU’LL LOVE THIS RECIPE
Prep in advance: This sushi sandwich recipe is best prepped in advance. Once you’ve cooked the rice, leave it to cool and meanwhile make all of your fillings. I’ve filled this onigirazu with tuna mayo, omelette, avocado, and fluffy rice. Wrap the sushi sandwich in plastic wrap or bees wax wraps, and then consume when you’re ready to eat!
Customisable: What I love about onigirazu, is that you can fill it with whatever you fancy! I also recommend fillings like crab sticks, salmon, vegan chickpea tuna, or cucumber.
Fuss-free: With regular sushi, you need a sushi roller…but with this sushi sandwich, you only require something to wrap the onigirazu in and you’re done! I’ve also provided you with the best and fail-proof sushi rice recipe down below!
INGREDIENTS
Sushi rice: Is a short grain rice that is perfect for sushi. You can also use wholegrain sushi rice if you would like. I wouldn’t recommend using a long grain rice, as it doesn’t have the right stickiness or consistency for this recipe.
Tuna: Tinned/canned tuna is perfect for this recipe. You could also use smoked salmon, vegan chickpea tuna, fried chicken, or anything you fancy!
Myriad Recipes » Recipes » Other
ONIGIRAZU (JAPANESE SUSHI SANDWICH)
Published: May 17, 2024 by Emily Roz · This post may contain affiliate links · Leave a Comment
This is my take on Onigirazu aka Japanese Sushi Sandwich. Filled with tuna mayonnaise, omelette, avocado, and the fluffiest sushi rice, it’s the perfect meal to prep ahead and eat for lunch or dinner. I served mine with a spicy sriracha mayo and it was so good.
One of my favourite meals to make for lunch is my sushi sandwich. You can make more than one so that you can have them throughout the week. They’re eaten cold, so no need to waste time heating anything up!
Another one of my favourite onigirazu sushi sandwiches is my Katsu Onigirazu sandwich, which combines chicken katsu and the concept of a sushi sandwich.
https://a34f114113c3a80c71393c9c1110282d.safeframe.googlesyndication.com/safeframe/1-0-40/html/container.htmlJump to:
- Why You’ll Love This Recipe
- Ingredients
- Recipe Variations
- Step by Step Instructions with Photos
- What To Do with Leftovers
- FAQs
- Other recipes you might enjoy!
- Onigirazu (Japanese Sushi Sandwich)
WHY YOU’LL LOVE THIS RECIPE
Prep in advance: This sushi sandwich recipe is best prepped in advance. Once you’ve cooked the rice, leave it to cool and meanwhile make all of your fillings. I’ve filled this onigirazu with tuna mayo, omelette, avocado, and fluffy rice. Wrap the sushi sandwich in plastic wrap or bees wax wraps, and then consume when you’re ready to eat!
Customisable: What I love about onigirazu, is that you can fill it with whatever you fancy! I also recommend fillings like crab sticks, salmon, vegan chickpea tuna, or cucumber.
Fuss-free: With regular sushi, you need a sushi roller…but with this sushi sandwich, you only require something to wrap the onigirazu in and you’re done! I’ve also provided you with the best and fail-proof sushi rice recipe down below!
If you’re a fan of sushi in general, then you’ll love my vegan sushi bake and my fail-proof sushi tacos!
INGREDIENTS
Sushi rice: Is a short grain rice that is perfect for sushi. You can also use wholegrain sushi rice if you would like. I wouldn’t recommend using a long grain rice, as it doesn’t have the right stickiness or consistency for this recipe.
Tuna: Tinned/canned tuna is perfect for this recipe. You could also use smoked salmon, vegan chickpea tuna, fried chicken, or anything you fancy!
Mayonnaise: This is to go with the tuna! You could use kewpie mayonnaise too.
Eggs: To make the omelette, we just use one egg and fry it up into a little square omelette.
Avocado: A ripe avocado adds a creamy freshness to our onigirazu sushi sandwich. You could also add sliced cucumber or red bell pepper for some crunch.
Seasonings: For the rice seasoning, we use a mixture of rice wine vinegar, salt, and sugar. The full measurements are found in the recipe card below.
Nori: Also known as sushi paper, you can buy them at most supermarkets. You’ll need two pieces for sandwich!
RECIPE VARIATIONS
Vegan: If you’re looking to make a plant-based onigirazu recipe, then I’d recommend making some chickpea tuna (crushed chickpeas, vegan mayo, finely chopped red onion, and a squeeze of lemon juice) and adding this to your filling along with sliced avocado, sliced cucumber, red bell pepper.
Meaty: I get it, some of you may not like fish, so another option that I love is frying up some chicken thighs or chicken breast and finely slicing them into pieces. Replace the tuna mayo with the chicken and you’ll be in for a treat.
Spicy: If you like things a bit hot, then add some red chilli flakes or sriracha sauce into the tuna mayo mixture.
STEP BY STEP INSTRUCTIONS WITH PHOTOS

Step 1: Pour 75g of sushi rice into a mug and note the volume it occupies. Transfer the rice to a saucepan and cover it with water. Stir well and drain to remove the water. You want a 1:1 ratio of water to rice volume quantity, so measure water in the mug up to the same level the rice reached, then pour this water into the saucepan. Ensure the rice is evenly spread and completely covered by water. Cover the saucepan with a lid and place it on medium heat. Once the water starts to boil, reduce the heat to low, keeping the lid on, and cook for 10 minutes. After 10 minutes, turn off the heat and let the rice sit for an additional 5 minutes with the lid still on.

Step 2: While your rice is cooking, combine tuna, mayonnaise, salt, and pepper in a bowl.
Myriad Recipes » Recipes » Other
ONIGIRAZU (JAPANESE SUSHI SANDWICH)
Published: May 17, 2024 by Emily Roz · This post may contain affiliate links · Leave a Comment
This is my take on Onigirazu aka Japanese Sushi Sandwich. Filled with tuna mayonnaise, omelette, avocado, and the fluffiest sushi rice, it’s the perfect meal to prep ahead and eat for lunch or dinner. I served mine with a spicy sriracha mayo and it was so good.
One of my favourite meals to make for lunch is my sushi sandwich. You can make more than one so that you can have them throughout the week. They’re eaten cold, so no need to waste time heating anything up!
Another one of my favourite onigirazu sushi sandwiches is my Katsu Onigirazu sandwich, which combines chicken katsu and the concept of a sushi sandwich.
https://a34f114113c3a80c71393c9c1110282d.safeframe.googlesyndication.com/safeframe/1-0-40/html/container.htmlJump to:
- Why You’ll Love This Recipe
- Ingredients
- Recipe Variations
- Step by Step Instructions with Photos
- What To Do with Leftovers
- FAQs
- Other recipes you might enjoy!
- Onigirazu (Japanese Sushi Sandwich)
WHY YOU’LL LOVE THIS RECIPE
Prep in advance: This sushi sandwich recipe is best prepped in advance. Once you’ve cooked the rice, leave it to cool and meanwhile make all of your fillings. I’ve filled this onigirazu with tuna mayo, omelette, avocado, and fluffy rice. Wrap the sushi sandwich in plastic wrap or bees wax wraps, and then consume when you’re ready to eat!
Customisable: What I love about onigirazu, is that you can fill it with whatever you fancy! I also recommend fillings like crab sticks, salmon, vegan chickpea tuna, or cucumber.
Fuss-free: With regular sushi, you need a sushi roller…but with this sushi sandwich, you only require something to wrap the onigirazu in and you’re done! I’ve also provided you with the best and fail-proof sushi rice recipe down below!
If you’re a fan of sushi in general, then you’ll love my vegan sushi bake and my fail-proof sushi tacos!
INGREDIENTS
Sushi rice: Is a short grain rice that is perfect for sushi. You can also use wholegrain sushi rice if you would like. I wouldn’t recommend using a long grain rice, as it doesn’t have the right stickiness or consistency for this recipe.
Tuna: Tinned/canned tuna is perfect for this recipe. You could also use smoked salmon, vegan chickpea tuna, fried chicken, or anything you fancy!
Mayonnaise: This is to go with the tuna! You could use kewpie mayonnaise too.
Eggs: To make the omelette, we just use one egg and fry it up into a little square omelette.
Avocado: A ripe avocado adds a creamy freshness to our onigirazu sushi sandwich. You could also add sliced cucumber or red bell pepper for some crunch.
Seasonings: For the rice seasoning, we use a mixture of rice wine vinegar, salt, and sugar. The full measurements are found in the recipe card below.
Nori: Also known as sushi paper, you can buy them at most supermarkets. You’ll need two pieces for sandwich!
RECIPE VARIATIONS
Vegan: If you’re looking to make a plant-based onigirazu recipe, then I’d recommend making some chickpea tuna (crushed chickpeas, vegan mayo, finely chopped red onion, and a squeeze of lemon juice) and adding this to your filling along with sliced avocado, sliced cucumber, red bell pepper.
Meaty: I get it, some of you may not like fish, so another option that I love is frying up some chicken thighs or chicken breast and finely slicing them into pieces. Replace the tuna mayo with the chicken and you’ll be in for a treat.
Spicy: If you like things a bit hot, then add some red chilli flakes or sriracha sauce into the tuna mayo mixture.
STEP BY STEP INSTRUCTIONS WITH PHOTOS
Step 1: Pour 75g of sushi rice into a mug and note the volume it occupies. Transfer the rice to a saucepan and cover it with water. Stir well and drain to remove the water. You want a 1:1 ratio of water to rice volume quantity, so measure water in the mug up to the same level the rice reached, then pour this water into the saucepan. Ensure the rice is evenly spread and completely covered by water. Cover the saucepan with a lid and place it on medium heat. Once the water starts to boil, reduce the heat to low, keeping the lid on, and cook for 10 minutes. After 10 minutes, turn off the heat and let the rice sit for an additional 5 minutes with the lid still on.
Step 2: While your rice is cooking, combine tuna, mayonnaise, salt, and pepper in a bowl.

Step 3: Crack an egg into a small bowl and give it a whisk, then get yourself a non-stick frying pan and add in a teaspoon of oil. Place it on medium heat and pour in the eggs. Form the omelette into a small square and season with salt and pepper. Flip the omelette and remove once cooked.

Step 4: Peel and slice your avocado, set it aside ready for assembly.
Myriad Recipes » Recipes » Other
ONIGIRAZU (JAPANESE SUSHI SANDWICH)
Published: May 17, 2024 by Emily Roz · This post may contain affiliate links · Leave a Comment
This is my take on Onigirazu aka Japanese Sushi Sandwich. Filled with tuna mayonnaise, omelette, avocado, and the fluffiest sushi rice, it’s the perfect meal to prep ahead and eat for lunch or dinner. I served mine with a spicy sriracha mayo and it was so good.
One of my favourite meals to make for lunch is my sushi sandwich. You can make more than one so that you can have them throughout the week. They’re eaten cold, so no need to waste time heating anything up!
Another one of my favourite onigirazu sushi sandwiches is my Katsu Onigirazu sandwich, which combines chicken katsu and the concept of a sushi sandwich.
https://a34f114113c3a80c71393c9c1110282d.safeframe.googlesyndication.com/safeframe/1-0-40/html/container.htmlJump to:
- Why You’ll Love This Recipe
- Ingredients
- Recipe Variations
- Step by Step Instructions with Photos
- What To Do with Leftovers
- FAQs
- Other recipes you might enjoy!
- Onigirazu (Japanese Sushi Sandwich)
WHY YOU’LL LOVE THIS RECIPE
Prep in advance: This sushi sandwich recipe is best prepped in advance. Once you’ve cooked the rice, leave it to cool and meanwhile make all of your fillings. I’ve filled this onigirazu with tuna mayo, omelette, avocado, and fluffy rice. Wrap the sushi sandwich in plastic wrap or bees wax wraps, and then consume when you’re ready to eat!
Customisable: What I love about onigirazu, is that you can fill it with whatever you fancy! I also recommend fillings like crab sticks, salmon, vegan chickpea tuna, or cucumber.
Fuss-free: With regular sushi, you need a sushi roller…but with this sushi sandwich, you only require something to wrap the onigirazu in and you’re done! I’ve also provided you with the best and fail-proof sushi rice recipe down below!
If you’re a fan of sushi in general, then you’ll love my vegan sushi bake and my fail-proof sushi tacos!
INGREDIENTS
Sushi rice: Is a short grain rice that is perfect for sushi. You can also use wholegrain sushi rice if you would like. I wouldn’t recommend using a long grain rice, as it doesn’t have the right stickiness or consistency for this recipe.
Tuna: Tinned/canned tuna is perfect for this recipe. You could also use smoked salmon, vegan chickpea tuna, fried chicken, or anything you fancy!
Mayonnaise: This is to go with the tuna! You could use kewpie mayonnaise too.
Eggs: To make the omelette, we just use one egg and fry it up into a little square omelette.
Avocado: A ripe avocado adds a creamy freshness to our onigirazu sushi sandwich. You could also add sliced cucumber or red bell pepper for some crunch.
Seasonings: For the rice seasoning, we use a mixture of rice wine vinegar, salt, and sugar. The full measurements are found in the recipe card below.
Nori: Also known as sushi paper, you can buy them at most supermarkets. You’ll need two pieces for sandwich!
RECIPE VARIATIONS
Vegan: If you’re looking to make a plant-based onigirazu recipe, then I’d recommend making some chickpea tuna (crushed chickpeas, vegan mayo, finely chopped red onion, and a squeeze of lemon juice) and adding this to your filling along with sliced avocado, sliced cucumber, red bell pepper.
Meaty: I get it, some of you may not like fish, so another option that I love is frying up some chicken thighs or chicken breast and finely slicing them into pieces. Replace the tuna mayo with the chicken and you’ll be in for a treat.
Spicy: If you like things a bit hot, then add some red chilli flakes or sriracha sauce into the tuna mayo mixture.
STEP BY STEP INSTRUCTIONS WITH PHOTOS
Step 1: Pour 75g of sushi rice into a mug and note the volume it occupies. Transfer the rice to a saucepan and cover it with water. Stir well and drain to remove the water. You want a 1:1 ratio of water to rice volume quantity, so measure water in the mug up to the same level the rice reached, then pour this water into the saucepan. Ensure the rice is evenly spread and completely covered by water. Cover the saucepan with a lid and place it on medium heat. Once the water starts to boil, reduce the heat to low, keeping the lid on, and cook for 10 minutes. After 10 minutes, turn off the heat and let the rice sit for an additional 5 minutes with the lid still on.
Step 2: While your rice is cooking, combine tuna, mayonnaise, salt, and pepper in a bowl.
Step 3: Crack an egg into a small bowl and give it a whisk, then get yourself a non-stick frying pan and add in a teaspoon of oil. Place it on medium heat and pour in the eggs. Form the omelette into a small square and season with salt and pepper. Flip the omelette and remove once cooked.
Step 4: Peel and slice your avocado, set it aside ready for assembly.

Step 5: Once your rice is cooked, combine in a small bowl your rice wine vinegar, sugar, and salt. Place in the microwave to let the salt and sugar dissolve, then pour it over your rice. Fluff it up and give it a stir, then pour it out onto a plate and into the fridge to cool.

Step 6: Once your rice is cool, place a nori sheet on a chopping board with an angle facing towards you. Place a layer of sushi rice down in a square with a straight side facing you. Then top with all your filling ingredients: sliced avocado, omelette, tuna mayo, more avocado, and more rice.
Myriad Recipes » Recipes » Other
ONIGIRAZU (JAPANESE SUSHI SANDWICH)
Published: May 17, 2024 by Emily Roz · This post may contain affiliate links · Leave a Comment
This is my take on Onigirazu aka Japanese Sushi Sandwich. Filled with tuna mayonnaise, omelette, avocado, and the fluffiest sushi rice, it’s the perfect meal to prep ahead and eat for lunch or dinner. I served mine with a spicy sriracha mayo and it was so good.
One of my favourite meals to make for lunch is my sushi sandwich. You can make more than one so that you can have them throughout the week. They’re eaten cold, so no need to waste time heating anything up!
Another one of my favourite onigirazu sushi sandwiches is my Katsu Onigirazu sandwich, which combines chicken katsu and the concept of a sushi sandwich.
https://a34f114113c3a80c71393c9c1110282d.safeframe.googlesyndication.com/safeframe/1-0-40/html/container.htmlJump to:
- Why You’ll Love This Recipe
- Ingredients
- Recipe Variations
- Step by Step Instructions with Photos
- What To Do with Leftovers
- FAQs
- Other recipes you might enjoy!
- Onigirazu (Japanese Sushi Sandwich)
WHY YOU’LL LOVE THIS RECIPE
Prep in advance: This sushi sandwich recipe is best prepped in advance. Once you’ve cooked the rice, leave it to cool and meanwhile make all of your fillings. I’ve filled this onigirazu with tuna mayo, omelette, avocado, and fluffy rice. Wrap the sushi sandwich in plastic wrap or bees wax wraps, and then consume when you’re ready to eat!
Customisable: What I love about onigirazu, is that you can fill it with whatever you fancy! I also recommend fillings like crab sticks, salmon, vegan chickpea tuna, or cucumber.
Fuss-free: With regular sushi, you need a sushi roller…but with this sushi sandwich, you only require something to wrap the onigirazu in and you’re done! I’ve also provided you with the best and fail-proof sushi rice recipe down below!
If you’re a fan of sushi in general, then you’ll love my vegan sushi bake and my fail-proof sushi tacos!
INGREDIENTS
Sushi rice: Is a short grain rice that is perfect for sushi. You can also use wholegrain sushi rice if you would like. I wouldn’t recommend using a long grain rice, as it doesn’t have the right stickiness or consistency for this recipe.
Tuna: Tinned/canned tuna is perfect for this recipe. You could also use smoked salmon, vegan chickpea tuna, fried chicken, or anything you fancy!
Mayonnaise: This is to go with the tuna! You could use kewpie mayonnaise too.
Eggs: To make the omelette, we just use one egg and fry it up into a little square omelette.
Avocado: A ripe avocado adds a creamy freshness to our onigirazu sushi sandwich. You could also add sliced cucumber or red bell pepper for some crunch.
Seasonings: For the rice seasoning, we use a mixture of rice wine vinegar, salt, and sugar. The full measurements are found in the recipe card below.
Nori: Also known as sushi paper, you can buy them at most supermarkets. You’ll need two pieces for sandwich!
RECIPE VARIATIONS
Vegan: If you’re looking to make a plant-based onigirazu recipe, then I’d recommend making some chickpea tuna (crushed chickpeas, vegan mayo, finely chopped red onion, and a squeeze of lemon juice) and adding this to your filling along with sliced avocado, sliced cucumber, red bell pepper.
Meaty: I get it, some of you may not like fish, so another option that I love is frying up some chicken thighs or chicken breast and finely slicing them into pieces. Replace the tuna mayo with the chicken and you’ll be in for a treat.
Spicy: If you like things a bit hot, then add some red chilli flakes or sriracha sauce into the tuna mayo mixture.
STEP BY STEP INSTRUCTIONS WITH PHOTOS
Step 1: Pour 75g of sushi rice into a mug and note the volume it occupies. Transfer the rice to a saucepan and cover it with water. Stir well and drain to remove the water. You want a 1:1 ratio of water to rice volume quantity, so measure water in the mug up to the same level the rice reached, then pour this water into the saucepan. Ensure the rice is evenly spread and completely covered by water. Cover the saucepan with a lid and place it on medium heat. Once the water starts to boil, reduce the heat to low, keeping the lid on, and cook for 10 minutes. After 10 minutes, turn off the heat and let the rice sit for an additional 5 minutes with the lid still on.
Step 2: While your rice is cooking, combine tuna, mayonnaise, salt, and pepper in a bowl.
Step 3: Crack an egg into a small bowl and give it a whisk, then get yourself a non-stick frying pan and add in a teaspoon of oil. Place it on medium heat and pour in the eggs. Form the omelette into a small square and season with salt and pepper. Flip the omelette and remove once cooked.
Step 4: Peel and slice your avocado, set it aside ready for assembly.
Step 5: Once your rice is cooked, combine in a small bowl your rice wine vinegar, sugar, and salt. Place in the microwave to let the salt and sugar dissolve, then pour it over your rice. Fluff it up and give it a stir, then pour it out onto a plate and into the fridge to cool.
Step 6: Once your rice is cool, place a nori sheet on a chopping board with an angle facing towards you. Place a layer of sushi rice down in a square with a straight side facing you. Then top with all your filling ingredients: sliced avocado, omelette, tuna mayo, more avocado, and more rice.

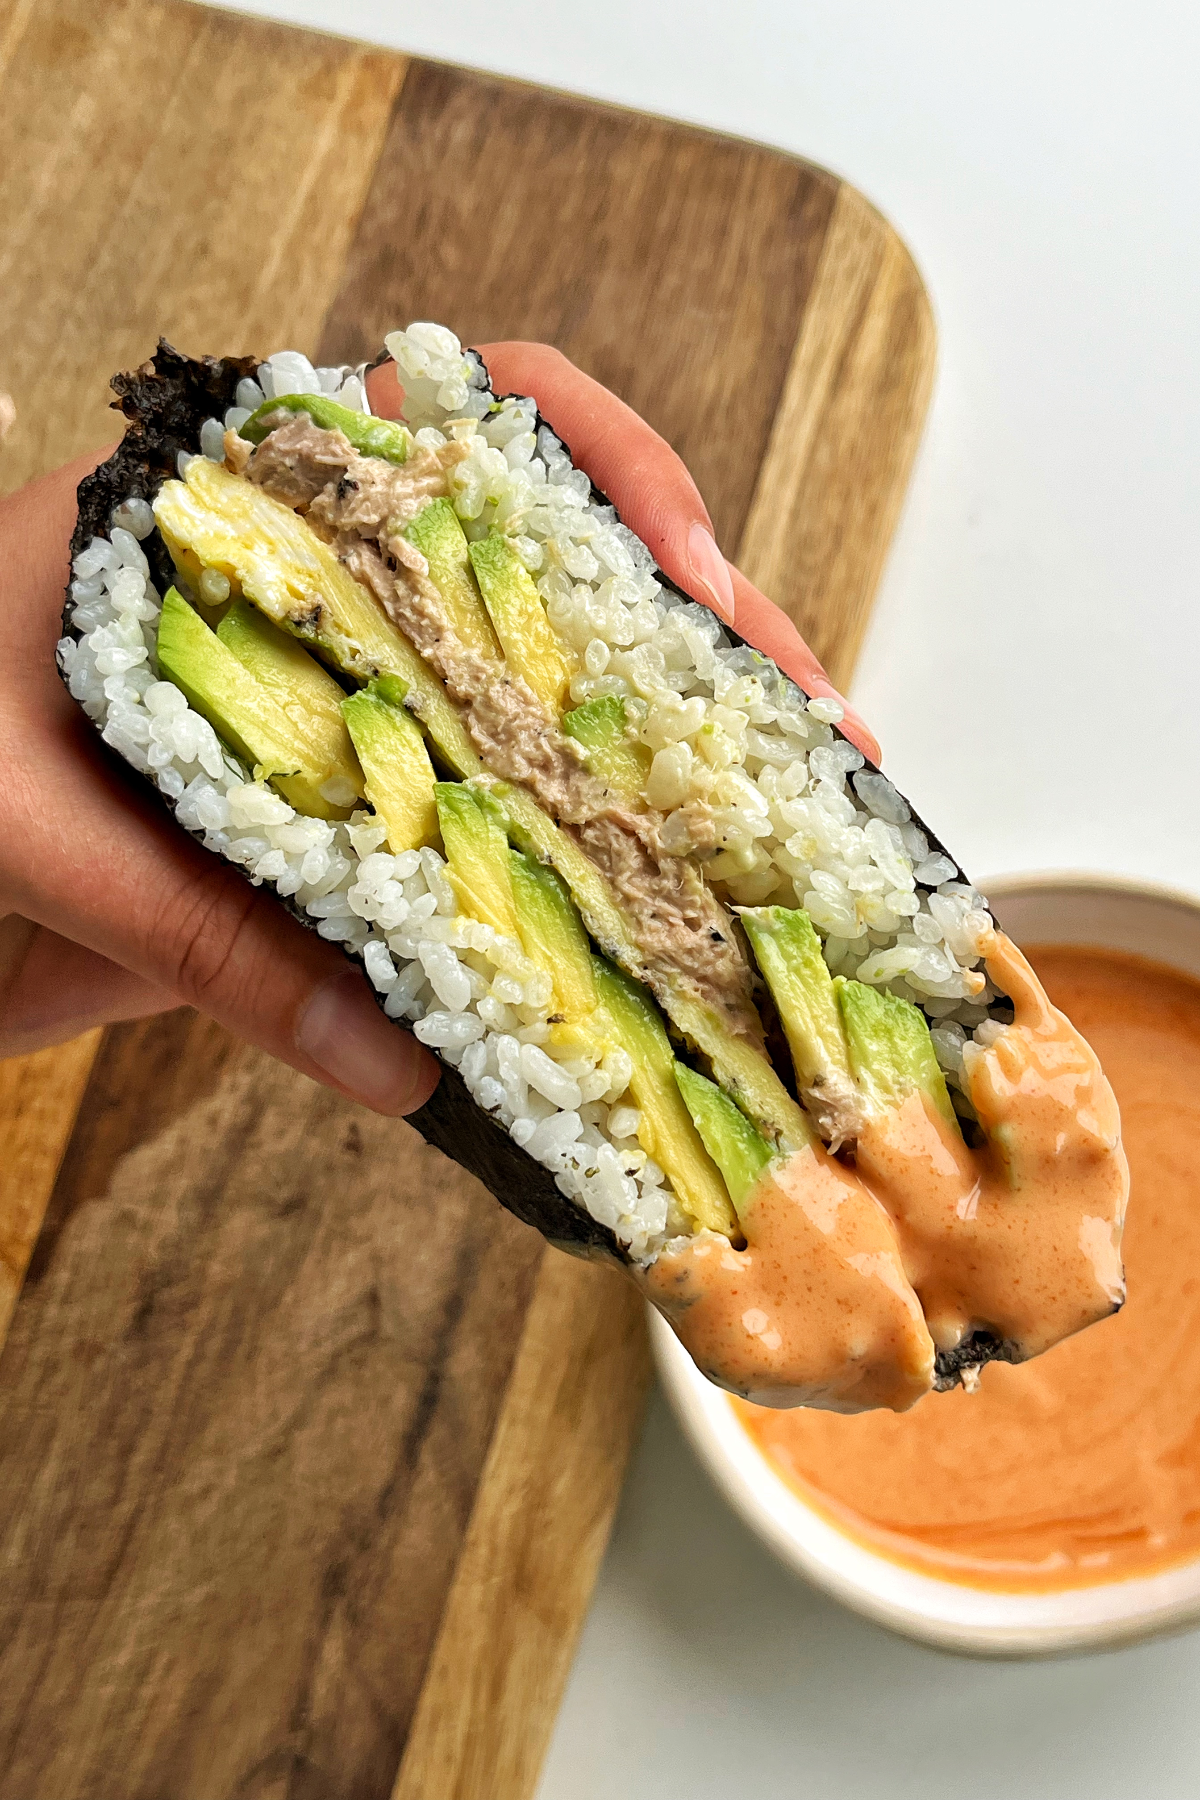
Step 7: Get your second piece of nori and cut it into a medium-sized square that is a bit bigger than the square of your fillings. Brush the large nori sheet’s edges with rice wine vinegar, then fold everything up together and wrap in cling film. Place in the fridge to firm up.

Step 8: Prepare some sriracha mayonnaise or whatever you fancy as a dipping sauce and enjoy!
WHAT TO DO WITH LEFTOVERS
Storage: Your onigirazu sushi sandwich can be wrapped in cling film/plastic wrap and placed in a Tupperware and into the fridge. Consume within 2-3 days. Alternatively, you can prepare all of the ingredients including the rice and store it all in separate containers, store for up to 4 days in the fridge, and then assemble when ready to eat!